
You’ve done your research and decided which marketing automation software you’re going to use. If you are new to marketing automation (MA) software, knowing where to start and what you need to do first can be overwhelming. There are so many possibilities and tools that can help you achieve your goals if used correctly.
To make it easier for you, we put together 10 tips on how to properly get started with marketing automation.
Get Started with Marketing Automation in 10 Steps
To get the best results, you need to set yourself up for success. That means kickstarting your marketing automation journey the right way.
Marketing automation drives a 14.5% increase in sales productivity and a 12.2% reduction in marketing overhead.
Invespcro
1. Go over the software’s onboarding or training program
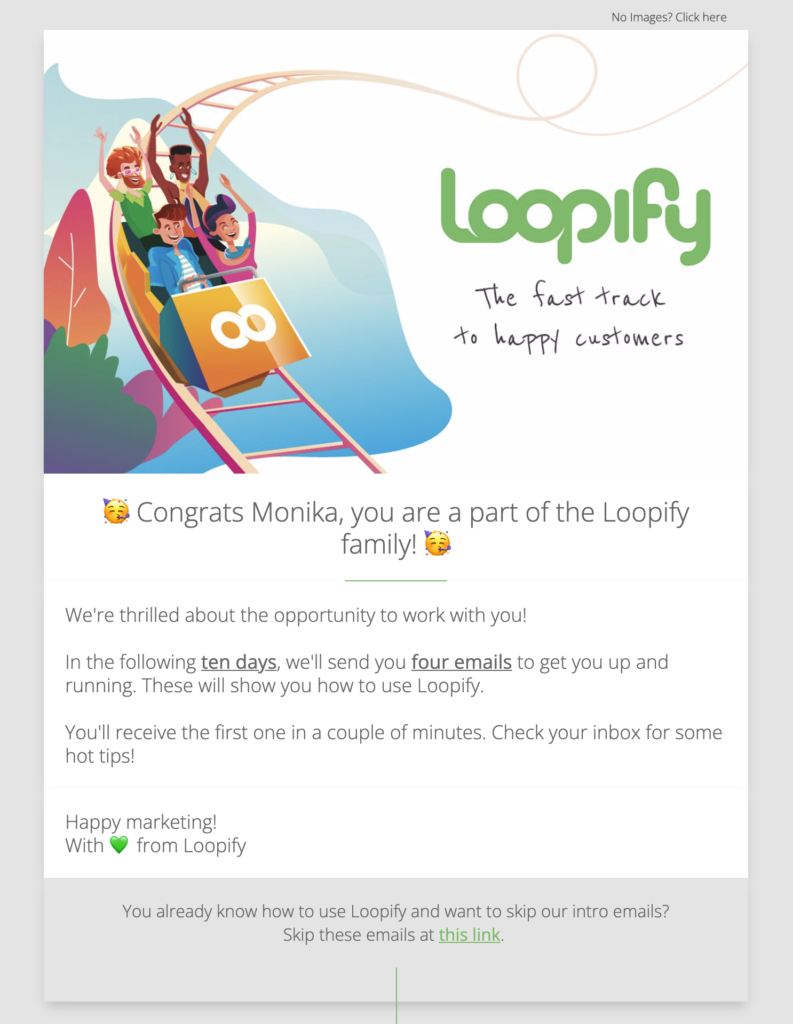
Onboarding programs are there for a reason. They start as soon as you sign up for the software and are either done via email or within the software itself with interactive tips. You’ll usually receive a welcome email like the one below letting you know what you can expect.
The onboarding program is a great chance to learn the basics, where to start, and how to make the most of the software. You can find tips, advice, and examples that will help you understand the possibilities of the software and what you can do with its tools.
If you have scheduled training sessions or webshops with the Success team, your team will get advice tailored to your business needs. Training sessions will help you learn about the tools and how to use them in the most effective way to solve your problems.
Tip: If multiple people are going to use the automation software, make sure all of them are trained on how to use it properly. You need everyone to be on the same page about contact grouping, setup, and campaign implementation.
Have a handy document to share with new employees and brief them on how everything is organized within your account. Otherwise, mistakes and uncoordinated decisions will end up costing you more.
2. Integrate with your CRM solution
If you store your customer data using a Customer Relationship Management (CRM) solution, you’ll need access to it in your marketing automation solution. This way, you can make sure that you are sending personalized communication to your contacts.
This means that you need to sync both your CRM and MA software to send information back and forth. You want your customer information to be up-to-date, otherwise, your communication will fall short.
Once you set them up correctly, your data gets updated automatically, and you are good to go.
Tip: To sync both solutions correctly, you may need the help of an IT tech to help you out or just ask the Success or Support teams to help you out. To send data back and forth, you can use the API and Webhook tools in Loopify.
3. Import & segment customer data
There are different ways you can import your contact data.
You can set up in advance to import your data automatically. This way, you send real-time data from your CRM as it happens, and you can rest assured that your data is up-to-date.
You also have the option to import customer data by uploading a CSV or Excel file with your contact data. Just remember that with manual import, you’ll need to repeat this process and make sure you update your existing contact information and import the new data you’ve gathered.
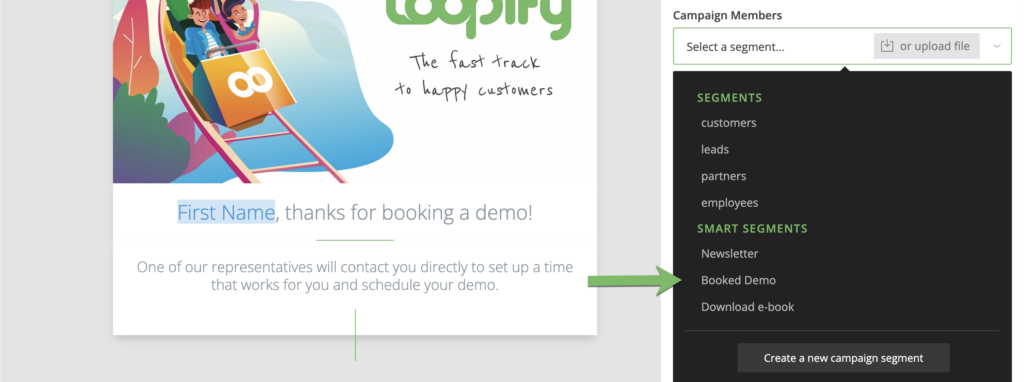
Once you import the contact data, you should categorize and group your contacts based on the data you have on them.
Consider their interests, geographical location, buyer persona(s), or whatever grouping makes sense for you. This way, you can send personalized communication to your customers and target each group or segment based on their preferences or engagement.
Tip: Format the CSV or Excel file correctly. Otherwise, your import will either fail, or the data won’t be imported properly. The MA software you use will have tips on the formatting rules you need to follow to make sure everything is imported successfully.
4. Add and verify your sending domain
If you are using email, the chances are you would like to use your sending domain to send emails. Here’s how you can set it up in Loopify.
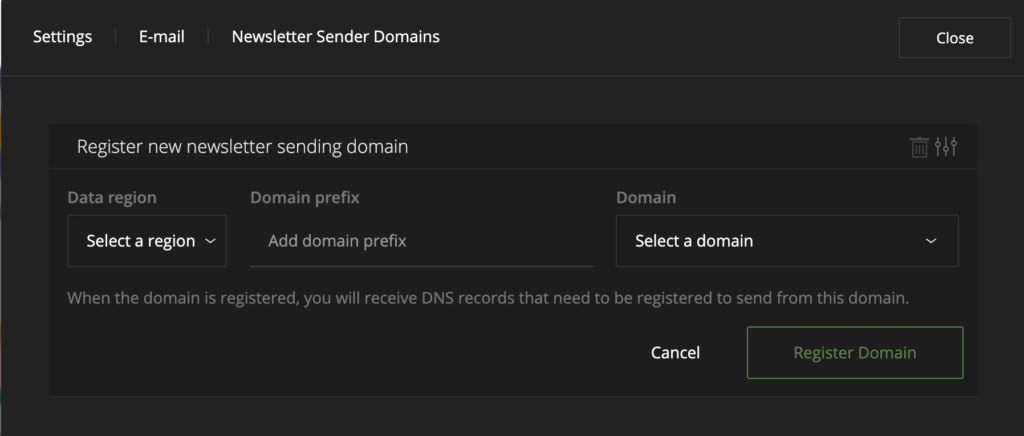
To use your domain, you need to complete the DNS process and verify that this is, in fact, the domain you own. This process is a bit technical, and you may need to involve your IT tech to help you set it up correctly.
Once you verify your domain, you can set up your email senders, and you’re ready to send your first newsletter. Type in the sender name you want your subscribers to see, the email address, and another email address people can use to reply to your emails.
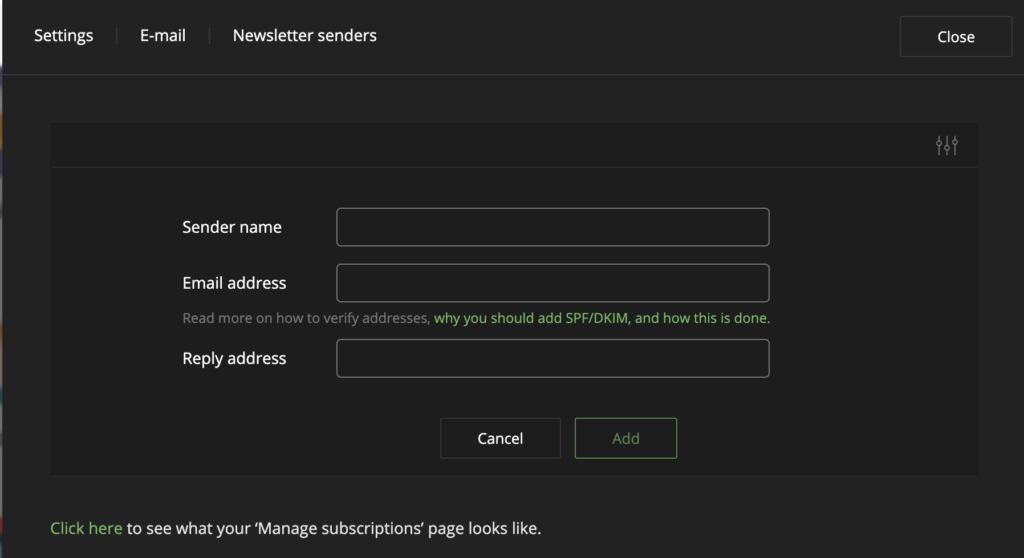
Tip: DNS verification can take up to 48 hours, so plan to set this up in advance and not when you decide to send your first email campaign.
5. Decide what needs to be automated
Take time to write down your strategy beforehand. Decide what you want to achieve and which manual tasks you need to automate because not everything needs to be automated.
- What are your goals?
- Which tools are you going to use to achieve your goals?
- How are you going to segment your audience?
- Which KPIs and metrics are you going to use to measure your results?
- Which team members are going to be involved? What are their tasks?
These are just a few of the questions that you need to answer.
Also, when running an automated flow campaign, it’s best to plan and map the customer journey. Jot down the campaign objective, the contacts you are targeting, the type of communication that will go out, the type of information you would like to gather, campaign timing, and schedule date, and more.
This will make it easier for you to keep track of the campaign and catch any mistakes and make sure you don’t forget anything.
Tip: Follow our advice and tips on making the most of marketing automation.
6. Add your brand styles
People should immediately recognize you based on your brand, and your communication should follow your brand style.
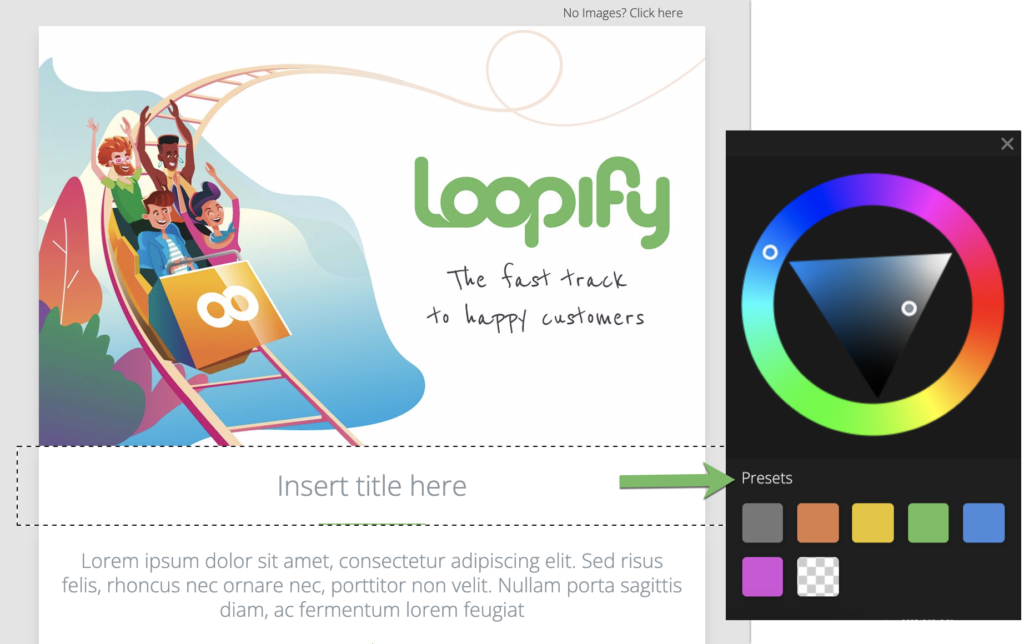
Upload your fonts, brand colors, and logo to your account, and you’ll be able to use them in all your campaigns to make them recognizable.
7. Set up templates
Once you have all the technical parts set up, you can start on your first campaign, which in most cases is an email.
The marketing automation software will have a selection of ready-made templates you can choose from. Just add the text and your images; no coding is needed. The drag-and-drop builder will make it easy for you to create different email templates and campaigns in an instant.
Another option we offer in Loopify is to have a custom-made template for your brand. You can choose the design and specify which elements you want it to contain, and the software’s template development team will take care of the rest.
8. Do a warm-up campaign
If your domain is brand new and this is the first time you are sending email communication, start with a warm-up campaign. A warm-up campaign means that you’ll set up to send the same email to a large group of people but spread it out over days, with the number of receivers increasing gradually every day.
Here’s what a domain-warmup campaign looks like in Loopify.
We recommend you do this to prove you know how to send bulk emails and that your intent is not spamming. This will improve your sending reputation and will give you a better rating to avoid spam filters.
9. Start with simple automations
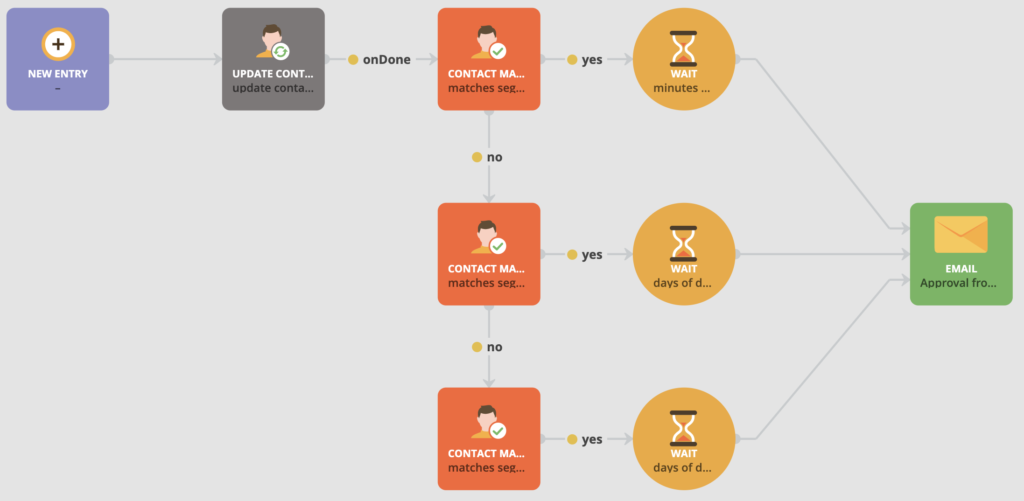
Automated flow campaigns offer so many possibilities that it may seem scary in the beginning. Take one step at a time and start with something simple like newsletter signup and create a monthly newsletter.
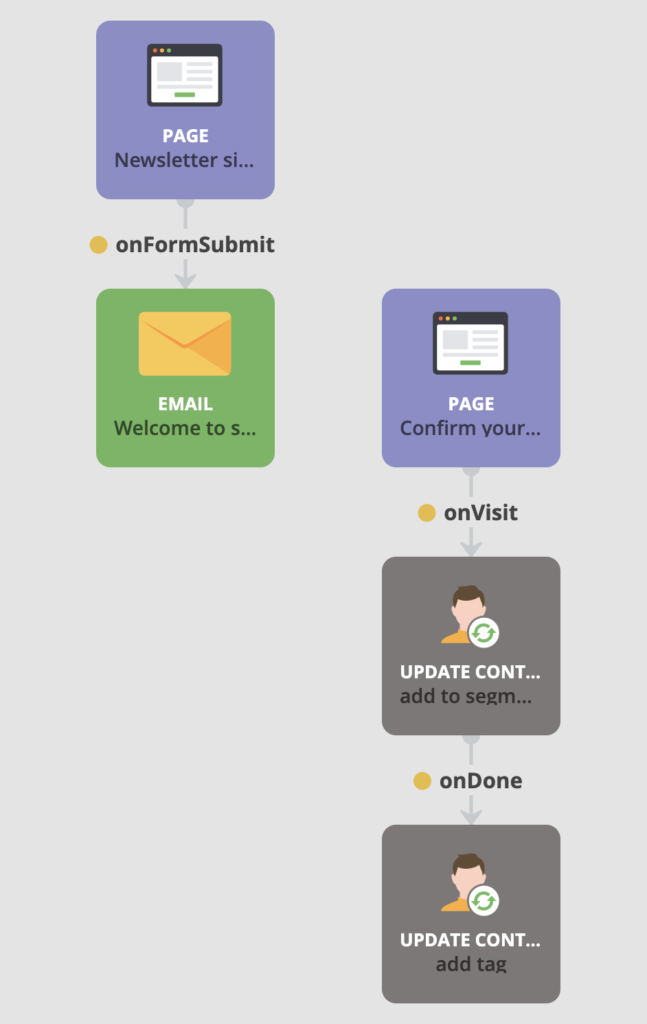
Here’s what a simple Newsletter Sign-up flow would look like.
- First, you create a landing page with a simple form where they can leave their email.
- When people submit the form, they’ll receive an email with a link to confirm their email.
- Once they confirm the email, you can add them to a segment like Leads or Newsletter. You can also choose to tag them.
When you start building automated flows, remember that the simpler, the better. This doesn’t mean that you can have elaborate campaigns that cover complex scenarios. It means that you need to start slow and build up your experience first.
Tip: Not every email needs to be a part of an automated flow campaign. Sometimes a single email will do. Don’t overcomplicate things, this will only make things harder for you.
10. Analyze your results
Once your campaign starts running, don’t forget to check its performance.
Analyze the results and see what people react positively to and do more of that. As people interact with your campaigns, you’ll find out more about your contacts and can send more relevant communication.
Measuring your results should be easy, depending on the solution you use. Some will offer more data than others, so consider the analytics and reporting tool when choosing your software.
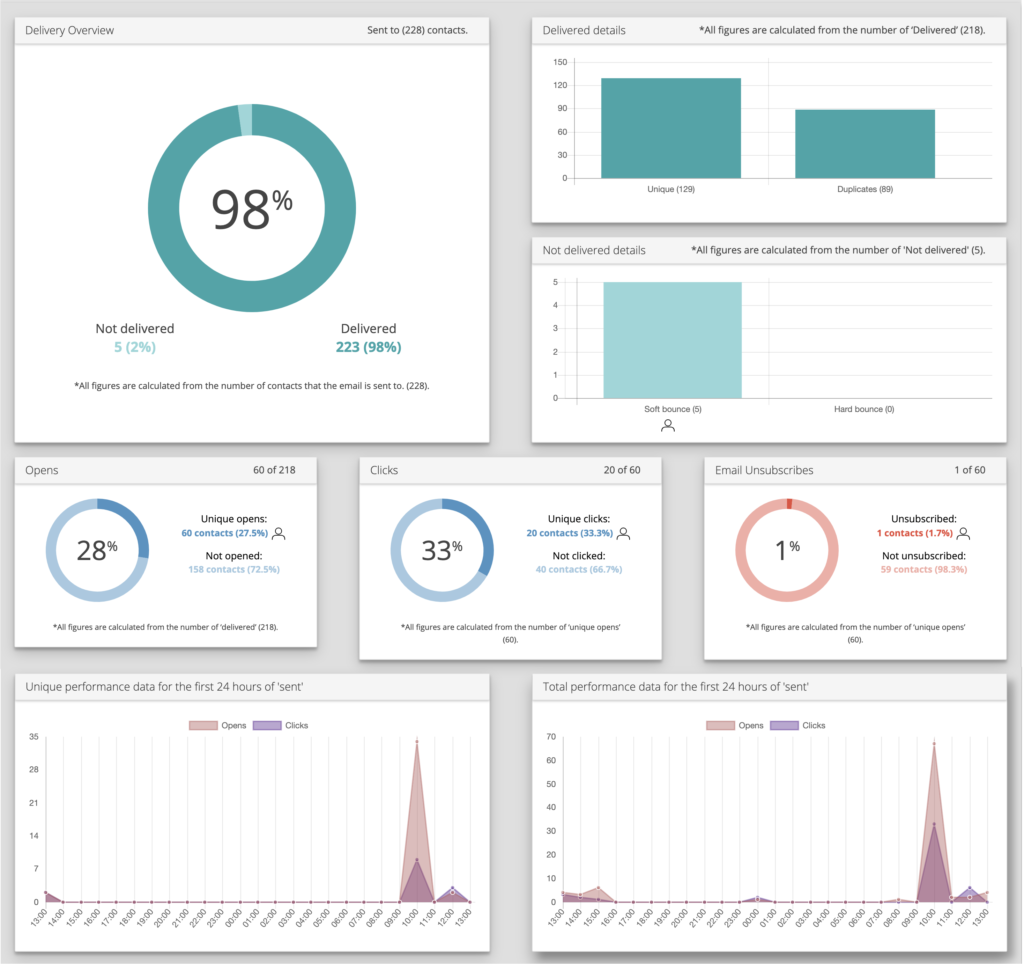
The data is already calculated and presented in a simple way so you can analyze everything from simplified dashboards.
Here you’ll see important metrics like opens, clicks, unsubscribes, click-through rates, form submits, email and SMS bounces, and more.
Don’t be afraid to try split (a.k.a. A/B) testing to learn what performs better and make sure you do more of it. Test emails with different subjects, calls to action, imagery, copy, button positions, and more. Remember to test one thing at a time; otherwise, you won’t know which change contributed to the improved performance.
The tl;dr version
- Go over the software’s onboarding or training program to get tips, advice, and examples on how to make the most of the software. Train every employee working with the marketing automation software on how to use it.
- Sync your CRM system with the marketing automation software to send data back and forth and keep your customer information up-to-date.
- Import your customer data either manually or automatically. It’s vital that you segment and group your contacts to send personalized communication.
- Add and verify your sending domain to send emails using your business email address.
- Have a strategy in place about your campaigns, goals, what you need to automate, and which tools you will use.
- Add your fonts, colors, and logo to the account to give your campaigns a consistent look with your brand.
- Set up the templates you are going to use to create campaigns or ask for a custom template.
- Do a warm-up campaign if your domain is brand new and this is the first time you are sending emails to build up your sending reputation and avoid the spam filters.
- Start by building simple automations. If you have one huge flow automation, it may be better to split it up into several small ones and interconnect them. Don’t overcomplicate things; sometimes, a single email will do.
- Analyze the campaign results and see what people react positively to and do more of that. Try A/B testing to learn what works with your audience and boost your performance.
Those are the basics of getting started with marketing automation software. The main thing is to set up your account for long-term success and start simple. As you go along, you’ll learn more and will be able to dive deeper.